 Articular Cartilage Overview

Articular cartilage is a smooth, white tissue covering the ends of bones in joints, facilitating smooth movement with minimal friction. Damage to this cartilage can result from injury or normal wear and tear, and because cartilage heals poorly on its own, surgical interventions have been developed to stimulate new cartilage growth, relieve pain, and improve joint function. These procedures can also delay or prevent arthritis onset.
Types of Cartilage Damage
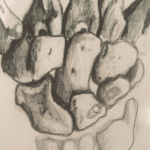
Hyaline Cartilage
Hyaline cartilage is the primary component of joint surfaces. Damage to this cartilage disrupts the smooth joint surface, leading to pain and difficulty in movement. This damage can also contribute to arthritis. Cartilage restoration aims to stimulate the growth of new cartilage or implant new cartilage, either hyaline or fibrocartilage, which is less durable but still practical.
Diagnosing Cartilage Damage
Joint injuries, such as meniscus or ligament tears, often accompany cartilage damage. Diagnosing cartilage damage can be challenging as hyaline cartilage does not contain calcium and is invisible on X-rays. During surgery, all related injuries are addressed.
Patient Eligibility
Ideal candidates for cartilage restoration are typically young adults with a single cartilage injury. Older patients or those with multiple lesions in one joint may not benefit as much. While the knee is the most common site for cartilage restoration, it can also be performed on the ankle, shoulder, and elbow.
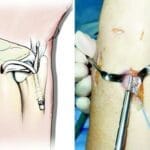
Surgical Procedures
Cartilage restoration procedures are often performed arthroscopically, involving small incisions and an arthroscope. In some cases, open surgery with more extensive incisions is necessary, especially if other joint issues, such as meniscal or ligament tears, need addressing. Recovery from arthroscopic procedures is usually quicker and less painful than that from open surgeries.
Common Cartilage Restoration Procedures
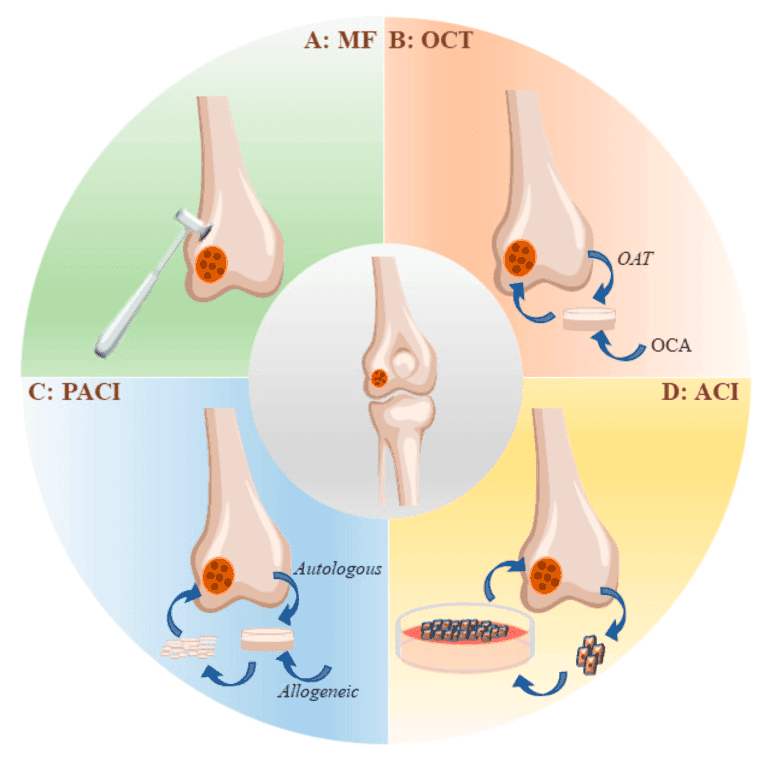
Microfracture
Microfracture aims to stimulate new cartilage growth by creating a new blood supply. The procedure involves making holes in the exposed bone surface to trigger a healing response, leading to the formation of fibrocartilage. This procedure is most effective for small lesions in less active patients.
Drilling
Like microfracture, drilling stimulates cartilage growth by creating holes in the subchondral bone. However, drilling can be less precise and may damage surrounding tissues. It produces fibrocartilage, which is suitable for smaller lesions in less active patients.
Abrasion Arthroplasty
Abrasion arthroplasty uses high-speed burrs to remove damaged cartilage and reach the subchondral bone, promoting fibrocartilage formation. It is effective for smaller lesions in patients with lower demand.
Matrix-Induced Autologous Chondrocyte Implantation (MACI)
MACI involves growing new cartilage cells from the patient’s tissue and implanting them into the cartilage defect. This two-step procedure suits younger patients with larger lesions and provides durable hyaline cartilage.
Osteochondral Autograft Transplantation
This procedure transplants healthy cartilage from one part of the joint to another, using a graft to repair the defect. It provides durable hyaline cartilage and is effective for more minor defects.
Osteochondral Allograft Transplantation
For more significant defects, an allograft from a cadaver donor is used. This provides a large graft of hyaline cartilage and bone shaped to fit the defect. Allografts are typically utilised when autografts are insufficient.
Stem Cells and Tissue Engineering
Research is ongoing to develop new methods for growing healthy cartilage using tissue engineering and mesenchymal stem cells. These experimental procedures aim to stimulate hyaline cartilage growth in damaged joints.
Rehabilitation Post-Surgery
After cartilage restoration surgery, protecting the joint surface while the cartilage heals is crucial. Rehabilitation is essential to ensure proper healing, restore mobility, and regain strength. The length and type of rehabilitation depend on the specific procedure performed, the location of the cartilage damage, and the patient’s overall health and activity level.
Initial Recovery Phase
Immobilisation and Weight-Bearing Restrictions
The joint must be immobilised in the initial weeks following surgery to allow the new cartilage to integrate and heal. For knee or ankle procedures, patients may be advised to avoid putting weight on the affected leg. Crutches or a walker are typically used during this period to assist with mobility and to prevent stress on the healing joint.
Continuous Passive Motion (CPM) Therapy
Continuous passive motion (CPM) therapy may be prescribed to promote healing and maintain joint flexibility. A CPM machine gently moves the joint through a controlled range of motion, which helps to prevent stiffness and improve blood flow to the healing cartilage. This therapy is typically started within the first few days after surgery and continued for several weeks.
Early Rehabilitation Phase
Range of Motion Exercises
Once initial healing has occurred, gentle range of motion (ROM) exercises are introduced. These exercises aim to maintain and improve joint flexibility without stressing the new cartilage. Examples of ROM exercises include:
Heel Slides:
Lying on your back with your legs straight, slowly slide your heel towards your buttocks, bending your knee as much as possible without causing pain. Hold for a few seconds, then slowly straighten your leg.
Quadriceps Sets:
Sit with your leg extended straight in front of you. Tighten your quadriceps muscle and press the back of your knee towards the floor. Hold for 5-10 seconds, then relax.
Isometric Exercises
Isometric exercises help to maintain muscle strength without joint movement. These exercises are essential during the early phase to prevent muscle atrophy. Examples include:
Quad Sets:

Tighten the thigh muscle and hold for 5-10 seconds, then relax. Repeat 10-15 times.
Gluteal Sets:
Squeeze your buttocks together and hold for 5-10 seconds, then relax. Repeat 10-15 times.
Intermediate Rehabilitation Phase
Strengthening Exercises
As healing progresses and weight-bearing restrictions are gradually lifted, strengthening exercises are introduced to rebuild muscle strength and support the joint. These exercises should be performed under the guidance of a physical therapist.
Examples include:
Leg Presses:
Push the weight away from your body using a leg press machine, then slowly return to the starting position. Start with low resistance and gradually increase as tolerated.
Mini Squats:
Stand with feet shoulder-width apart. Slowly bend your knees and lower your body as if sitting in a chair, then return to standing. Keep the movement within a pain-free range.
Calf Raises:
Stand with your feet hip-width apart. Slowly rise onto your toes, lifting your heels off the ground, then lower back down. If needed, hold onto a stable surface for balance.
Balance and Proprioception Exercises
Restoring balance and proprioception (awareness of joint position) is essential for joint stability.
Examples include:
Single-Leg Stands:
Stand on one leg for 30 seconds, then switch legs. To increase the difficulty, close your eyes or stand on a soft surface.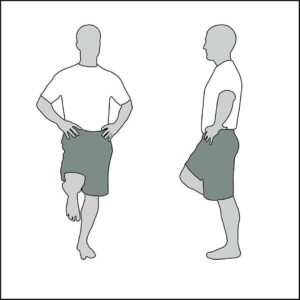
Bosu Ball Balancing:
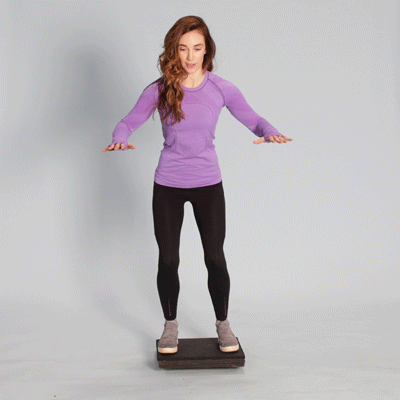
Stand on a Bosu ball or balance board and try to maintain your balance for 30-60 seconds. This exercise challenges your stability and strengthens the supporting muscles.
Advanced Rehabilitation Phase
Functional and Sport-Specific Exercises
As strength and stability improve, advanced exercises are introduced to prepare for a return to daily activities and sports. These exercises are tailored to the individual’s goals and their sport or occupation demands. Examples include:
Lunges:
Step forward with one leg and lower your body until both knees are bent at a 90-degree angle. Push back to the starting position and repeat on the other leg.
Step-Ups:
Step onto a raised platform with one leg, then bring the other leg up to join it. Step back down and repeat. Gradually increase the height of the platform.
Agility Drills:
Incorporate ladder drills, cone drills, and shuttle runs to improve coordination, speed, and agility.
Return to Activity
The timeline for returning to sports or strenuous activities varies based on the individual and the type of procedure performed. It may take several months to a year before total activity is resumed. A gradual return is essential to avoid overloading the healing cartilage. Your physical therapist will create a personalised plan to ensure a safe and effective transition to your desired activities.
Monitoring Progress
Regular follow-up appointments with your surgeon and physical therapist are crucial to monitor progress and make any necessary adjustments to the rehabilitation plan. Imaging studies, such as MRI, may be used to assess the healing cartilage and ensure the joint is recovering as expected.
A structured and gradual rehabilitation program is vital for successful cartilage restoration. Following your healthcare provider’s guidance and adhering to the recommended exercises will help you regain function, reduce pain, and improve the overall health of your joint.